Friday, September 30, 2011

Knock Knock

The WhiMSy love Etsy shop will be opening up again tomorrow!
I've cleaned it up a bit & will be continuing to offer a few of my all-time popular items. 
Also... be sure to peek at the NEW VINTAGE BUTTON RINGS! (Several inspired by my favorite season...Autumn.)
I've created a new shop banner & I'm really excited to be back.
Still taking it easy.
Just craftin' & chillaxin'.

Thursday, September 29, 2011

Help a Crafty Girl Out!!


As I write this, there are currently 9 hours left to vote in the "Do Something Crafty Challenge". I was one of 4 bloggers participating in this contest & my project needs your vote!
I'm in 3rd place.
Please, oh, please help a crafty girl out!!!
Click HERE & vote for the Blogger #1: Chair Top Covers on the right side of the blog.
Thanks!!

Wednesday, September 28, 2011

Snowmen Advent Garland

I had this idea a few months ago, &, I know it's a bit early to unveil Christmas-y stuff, but sometimes when I craft I just get too excited & hafta share right away!

The funny thing is, this snowmen advent garland was just gonna be a plain old plastic capsule advent garland until yesterday. I was just gonna hang up the capsules in a pretty little colorful row from some string & call it good. But, THEN, I hit some happy turbulence on my plane ride to Crafty Town.

In case you haven't figured it out yet, the snowmen are made from those plastic capsules you get from "gumball" machines. These large ones were 50cents each. So, step one in this project is to procure your capsules. I hit up a Walmart. (I haven't checked online for a source, but maybe ebay??) And, I'm not saying you won't look like a crazy lady popping all those quarters in the machines, spinning the handles & waiting with giddy claps for the prizes to come out. OK, so maybe I shouldn't have clapped so much. DO have a large sack or purse at the ready to hold all your trinkets.
You'll need to purchase 24 capsules. Beginning December 1st, you open one each day through Christmas Eve.

The next thing you'll want to do is to separate the lids from the bases. You'll be drilling two small holes into the lids of each capsule. I don't know what size drill bit I used. It doesn't REALLY matter. Mine was small---but not too small that I couldn't easily fit my cording through when I strung them all up.

Take your cord, or ribbon or twine or whatever you choose to string the capsules onto, & start adding your lids. You'll go down through the top & then up through the bottom. And you can cut your cord/ribbon/twine to whatever length you'd like.

After your cording is strung through, put some hot glue in the spot right in the center of the holes & add some pom poms. Try not to cover up the drilled holes with glue----so you can slide your snowman any which way if you need to, to adjust the position, etc.

The bases are clear-ish. If you want to maintain an air of mystery about what prizes are inside your advent garland, you'll have to cover that up somehow.
First, I took black puffy paint & made dollops for the eyes & mouth. Then, I cut out long skinny triangles from felt for the "carrot" nose. I hot glued those on.

Now it's time to go outside & paint! It doesn't matter if you do this step or the previous step first or second.
I bought the cheapest brand of WHITE spray paint at Walmart & also CLEAR SEALER. Spray one quick coat inside the bottom capsule. It doesn't have to be solid or perfect. When that is dry, spray another quick coat of the clear sealer. The white spray paint tends to get easily scratched on the plastic surface. The sealer helps to prevent scratches appearing so easily. Of course, you could spend a couple extra dollars & purchase Krylon spray paint made SPECIFICALLY for plastic surfaces & have no problem at all!
Another idea: Instead of painting inside, you can fill the capsule with white shredded crinkle paper. I know they sell it at Dollar Tree, among other places. Your little treasures will still stay hidden quite well!

When everything is dry, pop the lid & base together & you're done!! Isn't it adorable??!!
I'm so in love with this project.
Seriously.

Now, at 50cents each, it might seem kinda spendy to pay $12.00 for 24 capsules. BUT here's a tip: the toys are already inside! No need to go out & buy more trinkets or prizes! Of course, you can if you want. But remember, there's no need to spend a lot of money on little prizes. For me, advents are all about the waiting, the anticipation, the suspense, the surprise...


In fact, my 2 girls received ONE store-bought Barbie advent calendar a couple years ago. There were little prizes & Barbie accessories hidden behind each day's secret door. My girls swapped opening the prizes every other day. So, just because you have multiple kids doesn't mean you have to buy something for EVERYone, EVERY day! They can take turns getting the prize.

One of my favorite places to shop for tiny {& vintage-y} doo-dads is Tiny Things are Cute. They have a lot of fun things & you'll have fun lookin' around!
 
(63 days until the advent starts!)

Monday, September 26, 2011

Vote for me! I'm begging you!


Where's all my crafty fans at??
28 of you have voted. And, thanks for that!! But I need A LOT more votes to win this thing.
Do I feel like a loser currently being in last place? Yes.
Do I wanna win? Yes.
Am I begging you? Yes.
Am I desperate? Yes.
Click HERE to visit the post about voting in the "Do Something Crafty" Challenge. (The voting "ballot" is located on the right side of that blog.) My project is #1--the Chair Top Covers.
Voting continues through September 29th.

Sunday, September 25, 2011

Week in Review: September 19-25

From top left:
*Lunch at work
*Pumpkin bread for teachers
*The only leaves changing colors on a tree out front
*Early morning at the lakes with my church family for baptisms
*Hot from the oven pumpkin bread
*Bug catchers from dadddy
*Pretty little loaves
*Pumpkin pancakes
*Lost toy at the lakes
*Homecoming game
*Vintage pink hairdryer went bye-bye in the art studio purge
*Susan's sandy feetsies
*I love my football photog friends!

Happy Monday!

Friday, September 23, 2011

Let the VOTING begin!

Voting has begun!
You can vote for me {or one of the other 3 bloggers who participated in this contest} by clicking HERE!
My project is #1—the Chair Top Covers.
((Winner announced September 30th.))
Thanks!!

Pumpkin Bread 2011


Though the weather isn't so fall-ish this week, I'm STILL SOOOO excited that fall is finally here! Yesterday I baked the traditional "first-day-of-fall" pumpkin bread. The family consumed one mini loaf immediately after I took it out of the oven. Oh, it was delicous. And then we had some with our breakfast this morning.

The girls are always so giddy to give their teacher's the pumpkin bread every year.
And I'm always giddy packaging it up. Besides eating the stuff, embellishing it is my second favorite thing to do with it. This year's pumpkin bread decor included a wide strip of vintage plaid fabric tied in a simple knot. I think they kinda look like grandpa's old bow ties. I slipped a tag underneath the bow that reads "Happy first day of fall!" I glued a strip of brown paper along the bottom & then punched out a 1" circle from an old book & drew a heart right in the middle of the circle. I would have rather used the printer to make these, but my printer is out of service at the moment. I know the handwriting makes it look all handmade-y & personal, but sometimes I just can't stand my own handwriting.

Here's a peek at my pumpkin bread in the past. (Not sure what happened in 2008. Looks like I opted for some pumpkin cream cheese muffins instead.)

And, as always, I will share the recipe. Click HERE to find my fellow fall-loving, pumpkin-bread-baking friend, Lisa, over at Polka Dot Cottage. She's got the recipe!

Though I'd rather be cozy in a blanket right now, with the laptop, burning a warm mulled cider candle & listening to the likes of Billie Holiday, I have to work this morning & afternoon. Pooey. But, after I pick the girls up from school & we make our usual Friday library stop, it's home for dinner, & then the high school homecoming football game & s'mores in the fire pit afterwards!!! That sounds more like it!!


Happy First Day of Fall!!!!

Wednesday, September 21, 2011

My Project in the New Skills Festival

Be sure & check out my guest post on A Bit Of This and A Bit Of That as part of the New Skills Festival.
It's the latest handmade project fresh from this little crafty noggin of mine.
And make a point to view the other projects & "new skills" during the month of September too.
*Thanks Jo!*

Monday, September 19, 2011

Week in Review: September 12-18

I could have made at least 3 "Week in Review" collages for last week. It was a great week indeed.
Zoey's birthday combined with a trip to Denver was the highlight of it all.

Also last week: Crafty Night: September! We made fireside mocha, which is perfect for teacher's gifts & Happy Fall prezzies!

While in Denver I got to visit an IKEA store for the first time! OK, not that I was disappointed, but it was just not what I expected. First of all, I walked in the doors & it was SO confusing! Even the map didn't help me. I also think the fact that the Mr. & our two kidlets were waiting out by the front door for me didn't help. So, I had to speedwalk through the store. And then it just got worse. I would walk through a section & all of a sudden I'm somewhere else. That kept happening. And for a moment I was really lost. But I kept my cool & realized there were arrows on the floor to lead me out. I wished I had pocket fulls of cash to spend, but alas—I didn't. I did buy the girls each a really fun mesh tube thing you hang from the ceiling to hold toys in for $4.99. And I spent 49cents on 3-pack of wooden kitchen utensils that I was in desperate need of. The prices are definitely awesome at IKEA. And if I lived near one I would visit often. I LOVED the section where you could buy fabric by the yard. I didn't know that existed. I almost, but didn't quite, snag a yard.

It's been 2 years since I have been to a Burger King. I know. So dramatic, huh? But everytime I think of BK, I get all sad, thinking of the flame broiled whopper with cheese, no pickle, no onion please. On our mini Denver trip we visited a BK. And it's funny, because I wasn't that impressed anymore. Weird. If I never taste BK again, I will not be sad.

A visit to the Denver Anthropologie store was another weird visit. The only other Anthropologie I've been to, several times, is in Scottsdale, AZ. It is SUCH a beautiful store.
Maybe it was that the set-up of the Denver store was so different, or maybe the recent Anthropologie collections just aren't my style? I don't know. But it wasn't exciting at all. Not inspiring in the least. And to top it all off, they didn't have any catalogues available for me to take home & drool over.

If you haven't heard me talk about it yet, be sure to check out The Crafty Nest for my entry in Vanessa's "Do Something Crafty" challenge. My project went live today on her blog. For the next three days the other 3 amazing & talented bloggers' projects will be revealed. You can vote for your favorite this Friday, September 23rd. Winner will be revealed September 30th.
I worked really hard last week on completing the project before we left for Denver. (Phew!)

Last week was a busy week, for sure.
This week it's all about the purging & decluttering. I'm about to attack the most awful messy & unorganized room of all: my art studio. I have a deadline to finish it by Thursday night since our church yard sale is this Friday. Everything I've purged is being donated. I need that little bit of motivation & "push".

My art studio purge is VERY necessary. I'm slowly working on getting my creative life in order, beginning in that tiny space in the basement I call "Hole Sweet Hole". And next I hope to revamp my Etsy shop banner, my blog banner. Get some new fun things in the shop. And then, eventually, open up with a fresh perspective, ready for the holidays...

Happy Monday!!

Click HERE for a photo play-by-play.

Zoey's Denver Birthday Trip

We took a mini trip over the weekend to Denver. To celebrate Zoey's birthday. No birthday "party" this year. We decided to create some family memories instead. And it was a great trip! Went by too quick of course. But we got to experience someplace we've never been. And here are my favorites from the weekend...

Happy Birthday Balloons
Mr. WhiMSy love asked the hotel staff to purchase balloons for us & have them waiting in the room when we returned from a day of exploring. They delivered, & it really made Zoey feel so special! Thanks to the peeps at the Fairfield Inn By Marriott Denver Cherry Creek. Zoey even got a bag of m&m's when we first got there. And later the next day the girls were both gifted sodas & popcorn for our movie night!

Ah-Mazing. Really!! The staff was sooooo friendly & sweet & they knew everything there is to know about those dolls. We went shopping in the early afternoon & it was so funny to watch my girls. I think they were overwhelmed & didn't realize it. They spun this way & that, looking at everything & bouncing around & pulling my arm in every direction to follow them &
"See this!" & "Do you see that, mom?!" They had been saving their money for months to make purchases & wanted to choose JUST the right thing. Daddy (overwhelmed in his own way) & I treated the girls to ear piercing & hair-do's for their dolls. Later in the evening we returned to the store for some free crafty fun. The girls got to make little Hawaiin lei's in celebration of Kanani, one of the newest dolls. It was so fun! I could really do a whole post on the American Girl store. Seriously. And the best part of our American Girl store visit? Zoey declared it "the best day of her life".

The White Chocolate Grill
This restaurant is right next door to the American Girl store in the Park Meadows Mall. They are "American Girl" doll friendly, which meant that they had seats for the dolls to sit in AND the girls got a free dessert for dining with their dolls. So, instead of a table for 4, we got a booth for 6. haha!
The food was DELICOUS! The chicken plate from the children's menu was my favorite. (I tasted everyone's food.) My side of honey roasted carrots was DIVINE! I must try to make some.

Crepes 'n Crepes
One afternoon we walked up & down 16th Street in downtown Denver. There are free shuttle bus thingies that go up & down 16th Street, stopping at almost every block. We spotted "crepes" & immediately headed in that direction. The hubby & I have an affection for crepes. On our honeymoon in San Franciso, we got some crepes at a little crepe stand & they were amazing. One of my favorite memories for sure. Anyway, we sat inside this little French cafe & watched crepes being made right in front of us. The water was served in tall bottles---so cute! Zoey & I shared a strawberry, banana, & nutella crepe, drizzled with chocolate sauce & dusted with powdered sugar. Pazely had a chocolate crepe & dad had some crazy crepe with all kinds of stuff shoved inside. It was really yummy stop for sure.

Keys to the City
Along 16th Street (& maybe other parts of the city??) there were brightly painted pianos scattered about. The sign on the side of the piano read "We invite you to play this piano at your liesure. No cost. Anyone can do it. Anytime." Sadly, the girls & I didn't get to play. We were busy walking along 16th Street, visiting this shop & that place, etc. And then, when we decided it was time to tickle the ivories, it started raining & the pianos were being covered with protective tarps. Sadness.

Free Bus Ride
The girls begged & begged & begged to ride the bus. It goes up & down 16th Street. I personally like walking so I can see things & take photos! But, we accomodated their repetetive request. And they had a blast. After each stop, which happened quite often, they would change seating or standing positions. I even had a drunk guy sit next to me, asking me to rate the severity of his black eye. Good times.

Soundwalk
A friend of mine told me I had to be sure & visit the "talking sidewalk". It's on Curtis Street, between 15th & 16th Streets in front of the Federal Reserve Bank Branch. Sounds come up from the grates in the sidewalk. Waterfalls, cows mooing, pigs squealing, old wonky cars chug-chug-chugging along....It was really cool!

California Pizza Kitchen
This restaurant was a favorite of the Mr. & mine when we lived in Arizona. We got to share it with the girls on this trip to Denver. For lunch & dinner. haha! We started out with 2 appetizers. The first was the chips & guacamole. The guac was so chunky & yummy, filled with large bits of avocado & corn. The second app was the Korean BBQ Steak Tacos. I think? They were spicy little delicoius soft tacos. One of my favorite meals at CPK is the BBQ Chicken Pizza. But my other favorite is the Pear & Gorgonzola Pizza: Bosc pears, Gorgonzola, Fontina, Mozzarella, caramelized onions and hazelnuts. Topped with field greens tossed in Gorgonzola ranch. My mouth is now watering...
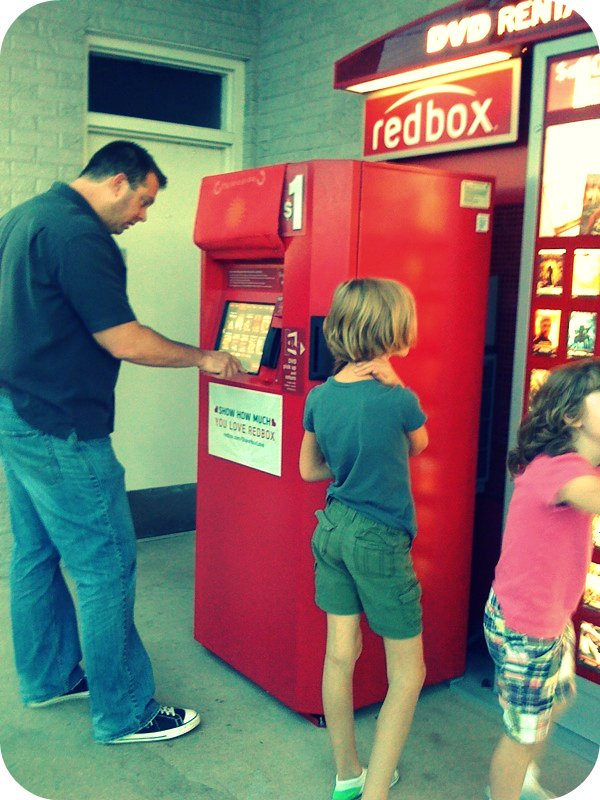
Red Box
I know this sounds silly. But we recently discovered how much money we can save if we rent movies through redbox rather than purchasing the EXPENSIVE movies on the TV at the hotel. We simply hook up one of the girls' portable DVD players to the hotel TV & we're good to go. Movie-watching is one of our favorite late-night things to do, after we've been out adventuring all day! And, there's no redbox near our house, so it was a treat for us!

The Lego Store
We walked inside the Park Meadows Mall & found a Lego Store. The Lego wall along the back of the store just LOOKS so cool. It's a decorate fixture & a useful storage space for Legos---all in one. For 15 bucks, you can fill a bucket with all sorts of shapes & sizes & colors of Legos. There's also a station where you can build your own Lego person with all different choices of hair, heads, arms, accessories, legs, bodies, etc. And then along both sides of the store are displays of Lego scenes hidden behind porthole-like cases. I loved the flies attacking the cake & the giant sandaled feet.

The Tattered Cover Bookstore
The same friend that recommended the Soundwalk, also recommended we stop for a visit at this book store. I am so glad we did. What an amazing place. The Tattered Cover began in 1971 & has grown from a 950 sq. ft space to 3 expansive locations in the greater Denver metro area. It's one of the largest independent bookstores in the United States. The girls LOVED looking around & finding secret little places to read in. The place is HUGE! The store has layers upon layers of books & cozy seating areas & beautiful old chairs & couches & chaises to lounge on. It's an amazing building & we spent a lot of time there. The children's area was one of my favorites. I browsed the kid's books while the Mr. sat upstairs, scanning the sports biographies. The upstairs does feel a bit like a library though. I felt I had to "hush" the girls several times so as not to bother the quiet readers in their silent nooks & peaceful crannies.

Walking in the Rain
As we ended our day of exploring one afternoon, walking along the streets, trying to remember WHICH parking lot we left the old trusty van in, we got wet & rained on. And it was fun!

Ah, yes. Our "create some fabulous memories" tank is now full.
For the time being...

Click HERE to view all the pics from our trip.

Sunday, September 18, 2011

Chair Top Covers

I was so excited when I was recently asked to be part of the "Do Something Crafty" Challenge by Vanessa of the blog, The Crafty Nest.
This is what the "Do Something Crafty" Challenge involves: Vanessa sent me & 3 other bloggers the same materials. We had no idea what was coming to us. But we did know that we had 2 weeks to come up with something crafty with those materials. Each of our projects will be featured on The Crafty Nest, beginning September 19th.  Voting for your favorite crafty project begins on September 23rd & the winner will be announced September 30th.
I thought I'd share the tutorial for the project I submitted.
Click HERE to view my project on The Crafty Nest blog.
I didn't know what to call these things. So, I just called them "chair top covers". That sounds so lame, but I couldn't think of anything clever. All the clever parts of my brain worked so hard to come up with a project to make with those two supplies, that I just didn't have any cleverness left. haha!

These chair top covers require some sewing, but, if you wanted to, the bulk of the stitching can be done “no-sew" with heat-n-bond tape. I am giving lots of pictures & explanation to help someone who might be a novice sewer. What am I talking about? I'm pretty much a novice sewer. And this project is so easy. It's a rectangle. Folded in half. And stitched on 3 sides.

I've got several of these metal chairs around the house, & next door at the church, & they get used quite a bit for different events. But they're not the prettiest when it comes to seating, so I thought I'd spiffy 4 of them up. That's exactly how many chair top covers could be made from this one yard of fabric. I also used the scraps to embellish them, so I eneded up having ZERO scraps leftover! Of course, you can cover whatever sorts of chairs you wanted to.

The backs of my metal chairs measured 18 1/2" across x 8 1/2" tall. I added 1/2" on each side for seam allowance. So that means I needed each rectangle piece of fabric to be 19 1/2" x 9 1/2". I took my yard of fabric & ironed it into quarters. Then I followed along the crease & cut with scissors. (Before you do this, measure & make sure you are cutting enough fabric to complete your chair covers.) Now I had 4 equal rectangles. They were still a little big, so that's where I cut off the extra strips of fabric. Which meant I had 4 equal pieces of fabric scraps to play with later on in this project.


Iron over 1/4" along both bottom edges. (Those would be the long edges.) Then, fold over again & iron down another 1/4".

Now stitch along the bottom edges to secure the seams.

Next you'll want to fold your fabric so that the right side of the fabric (the side that will be showing when it's all done) is touching. Bottom edge should touch bottom edge, sides should touch sides.
Pin in place if you want to, to prevent the fabric from sliding around. Now stitch along both short sides with 1/2" seam allowance.
Turn the fabric inside out & open up the sides seams so you can iron them flat.
Now you're done with the base of each chair top cover!

And the real fun begins....the embellishing!!

Instead of making all the chair covers the same, I opted to create 4 unique styles, all only slightly varying.

I whipped out 9 pom-poms one evening while watching Project Runway. I learned a really cool trick for making pom-poms that requires a fork. Click HERE for the fork trick.

I had 4 equal strips of fabric leftover. Remember? And I left them in their raw state when stitching them as embellishments onto the chair top covers.

Chair cover #1 got a little rosette in the corner with one of the fabric scraps, & a pom-pom smack in the middle. Hand-stitch the fabric scrap along one edge to form a ruffled circle. Stitch in place to secure.

Chair cover #2 got ruffles all along the bottom edge using 2 of the fabric scraps. Gather the strips of leftover fabric with a needle & thread to make a long ruffle. Pin in place along the bottom of the chair cover & machine-stitch in place.


Chair cover #3 got five pom-poms hand-stitched along the bottom edge. Measure & mark with chalk for even placement before stitching.


Chair cover #4 got the last scrap of fabric. Use a needle & thread to stitch along the center of the fabric strip to create a ruffle. Pin in place along the vertical center of the chair cover. Machine-stitch to secure.

This project can be adapted to all sorts of occasions or holidays. I even created chair top covers for a Crafty Night I lead every month, using felt. I plan on screenprinting an image on the back of each cover with white ink. It just dresses things up a little & brings everything together.
It's the little things, you know?

Hope you like this project, & that it inspires you!
And I do hope you plan on checking out all the projects submitted by the other challengers.
I can't wait to see what everyone made!