

I had a few people ask about the labels I made so I thought I'd give a quick tute. Jeanetta from Splendid Things shared her "secret" with me & I'll share it with you.
You'll need to purchase some transfer paper specific to the style of printer you'll be using. (I've got an inkjet.) I found my paper at JoAnne's fabric store. It was hanging with all the quilty tools & stuff. Read the instructions on how to load it into your printer, etc. And REMEMBER to print the mirror image of your design. I still make mistakes on that one.
 Again, follow the directions about iron settings & such before ironing the image onto your fabric. I used muslin or plain colored cotton. I put a piece of white typing paper on top of the image before I ironed because my iron is a bit....um....messy.

 Again, follow the directions about iron settings & such before ironing the image onto your fabric. I used muslin or plain colored cotton. I put a piece of white typing paper on top of the image before I ironed because my iron is a bit....um....messy.
When cooled, peel off paper backing.

From here you can make your labels whatever style you wish. To make labels like mine, cut out strips of fabric that are a little larger on all sides than your muslin, using pinking shears.


From here you can make your labels whatever style you wish. To make labels like mine, cut out strips of fabric that are a little larger on all sides than your muslin, using pinking shears.


Machine stitch along the edges. I like using a haphazard-like stitch.

Now your labels are complete, ready to be sewn onto your handmade goodies.
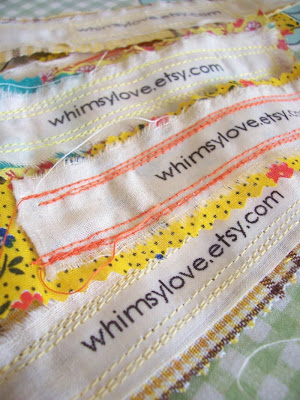


Now your labels are complete, ready to be sewn onto your handmade goodies.

Here's what Jeanetta's labels look like. These were stitched onto a sweet cupcake she made me.


That's it! Hope this helps!


