Showing posts with label nature. Show all posts

Wednesday, August 19, 2009

Whimsical Fairy Doors Tutorial

The girls & I just finished a 2-day project & we're so excited to share it with you! I recently found these Fairy Doors on Flickr & immediately fell in love. Ann Arbor, MI even has tours of secretly hidden fairy doors scattered around the city!
First, I cut some rounded door shapes, with a jigsaw, from a leftover piece of wainscoting/bead board. Any type of wood will work though as long as it's not too thick.
We spray painted the doors. House paint or exterior paint would work too.
Earlier in the summer we collected all sorts of fallen twigs, pine cones & acorns, etc to use for this project. We covered a table with newspaper & set out the twigs-n-stuff, along with acrylic paints, brushes, water bowls & paper towels.
You can leave your twigs natural, but we decided to add a bit of whimsy & paint them bright colors.

When your twigs are dry, you can adhere them to the door. First we played around with the design, getting the sticks to lay however we chose. Then, we applied floor & wall adhesive (the same stuff you use to lay tile floors) to our twigs & mushed it into place. I would've opted first to use my E6000 glue or even wood glue, but both those things are hard for my girls to use & I liked the spreadable texture of the floor adhesive. It is a bit stinky, so use ventilation or do this project outdoors. Wearing gloves is a good idea too.
I told the girls to really glop it on--so that it would stick. I really like the look of the adhesive oozing through the branches too. I suppose you could clean it up as you go along if that's not your style.
We constructed extra accessories for our fairy door with clay. (Fimo or Sculpey). I made some door hinges ...
...a mushroom doorknob & a "window". The window is just a small piece of round mirror I had. The girls used lids from the frosting of cinnamon roll tubes I saved. We just made snake-like shapes, wrapped it around the "window" & baked it in the oven just like that. I also added some leaves 'cause I thought mine looked a bit twiggish.
Zoey's door (my almost 7 year old):
Find a sweet little place to prop (or attach) your fairy door.
The fairies & pixies will know your kindness & hospitality when they see your magical & whimsical creations!
Here's my finished door:

Pazely's door (my 5 year old):

Tuesday, June 16, 2009

Ladybug LOVE.

The girls & I recently headed outside & searched the big tree in our front yard for ladybug eggs, larva & pupa. Our tree was covered in them & it was quite fun to go on a ladybug scavenger hunt through the leaves & branches to find them all-- in all their stages of life.
My recent Kindergarten graduate had been learning all about ladybugs during her last trimester of school, so I was fairly educated on the subject.
The only thing I didn't get a picture of were the larva we collected.
THIS SITE has some great information about the stages of ladybugs & how to care for them.
This photo shows that the larva has attached itself to a leaf, & has begun the pupal stage. There's a lot going on in that protective outer shell. Soon, a ladybug will emerge!
For collecting our temporary ladybug pets I grabbed some canning jars & covered the top with pink tulle secured with a rubber band.
Check out THIS LINK to Familyfun.com for some ladybug fun.
Schoolyard Safari is a SUPER source for ladybug anatomy, facts, lore & more!

Sunday, October 26, 2008

Leaf Rubbings Tutorial

I thought I’d do something with Autumn leaves, before they all fall to the ground with their crunchy brown selves. I admit that this craft started in a different way. I had read about how to pound leaves onto paper--just like flowers I’ve done in the past on fabric--but it didn’t go at all like the book said it would. So, I improvised & came up with this idea instead: leaf rubbings. (I love when stuff like that happens!)


After another delightful walk in the neighborhood, my 6-yr old & I collected some leafy specimens. We came home & laid out all our supplies. (My daughter, whining in the background: “Mom. WHY do you have to take PICTURES?!?!”…..She really should know me better than that.)
Here are your supplies: paper or notecards, wax paper, a smooth rock, & leaves.


A flat surface works best. We started “pounding” the leaves inside on the kitchen table. After we realized it wasn’t really working--& that our adjoining neighbors might not like the beat, beat, beat of the rocks, we went outside on the flat concrete & discovered that the "rubbing" process would work best.

You might want to practice on a piece of plain paper first, to get the feel of the pressure you should use & to see which leaves work best. I found the more vein-y, fresher leaves worked very well. And some of the leaves did better than others. Just experiment first.

So, first lay out your paper. We made cards. Place your leaf, or leaves, on top of the paper.

Put some wax paper on top of the leaf. You’ll want to hold the wax paper taut so the leaf underneath doesn’t move around much. It might move around a little--but that’s no biggie.

Take a smooth rock & start rubbing the leaf. You’ll find that in some spots--like on the edges of the leaf--going in one direction works best. You can take a peek during your work, by slightly lifting the edge of your leaf up & seeing if the color is bleeding onto the paper. By the way, that’s what you want: as much color as possible.

Don’t rub so hard that you start to tear the wax paper or smoosh the leaf guts onto your paper.


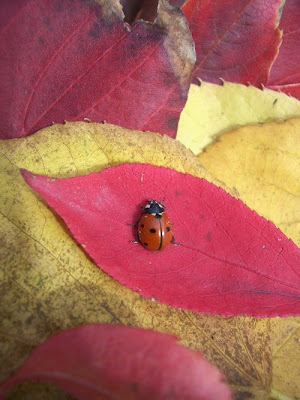
We had to pause during our craftin' to say hello to a ladybug that came to visit...

That's it! Now from here, you can embellish them, spiff 'em up a bit, whatever you want.
I left some cards blank.


On this one I rubbed several different leaves for a collage effect & then traced the outlines & veins with a glue pen & added glitter.
On this card I simply made a border with a brown pen.

This card was created using a rubbing of a single leaf.

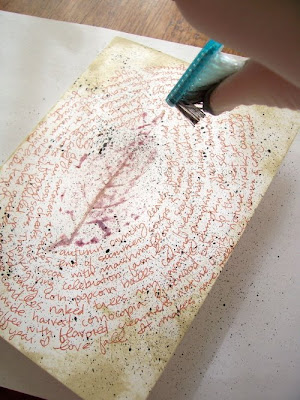
After writing words or phrases that remind me of "Fall" all around the leaf, I splattered black ink with a toothbrush all over the front of the card.

Black paint will work too. Just add a couple drops onto the toothbrush.

Wear gloves & flick away!

I distressed the corners & edges with some "Distress Ink" to give it an aged or worn appearance, & then added 4 triangle pieces to the corners with scrapbook paper.

Have fun making cards or decorations with your leaf rubbings. They'll be great for the upcoming Thanksgiving holiday!

Tuesday, October 21, 2008

Finally.....a Fall Walk!

Last year I took the girls on a Fall Walk to celebrate the first day of Fall. Well, when Fall came around this year, the view outside wasn't the picturesque "crunchy leaf" scene I had in my head. Now it is! Before out walk, my 4-year old performed a very scientific & intricate test outside to see if it was "jacket weather".


I just HAD to show this picture. My wee one has a runny nose, so I asked her to please put some tissues in her pocket for our walk. She came out of the bathroom, her pockets bulging with giant wads of tissues. HAHA! What a nerd.
We actually took a "Walk-n-Roll", because my 6-year old just HAD to bring along the miniature grocery shopping cart. The little one holds a bag---ready for treasures!


One of our goals on the walk was to stop by a neighboring house to see these beautiful red bushes! The girls wanted to touch them so badly.


Isn't this rock crazy? My littlest one found it. It looks exactly like a nose--with holes for the nostrils & everything!!


We also found the cutest tiny leaves. My girls described them as "dollhouse leaves".


Thanks for coming along on our walk. This breezy Fall day makes me want to fly a kite! Hey, that's not a bad idea....

Oh, & this is totally random & off the subject, but I've been thinking of listing all the tutorials I do (& have done) on the sidebar in a handy little tute section. What do you think?

P.S. I'm getting my hair cut today!!