Showing posts with label WhiMSy love. Show all posts

Thursday, December 15, 2011

Last Minute Shopping!

2 days left to do your holidy shopping at WhiMSy love!
Shop will be closed starting Saturday, December 17th & will re-open on January 2nd.
(And fork easels are back in the shop!)

PSST!!! For all my blog & facebook readers....For the next two days, enter coupon code 15OFF when checking out to receive 15% off your total order!

Saturday, November 12, 2011

Advent Giveaway!

HUGE PRIZE GIVEAWAY!!!
Every order purchased at WhiMSy love
will be entered to win a
WhiMSy love advent prize package.
Valid in the month of November, through the 27th.

Twenty-four little prezzies (valued at $155!) will be mailed to the winner on November 28th.
All the packages are numbered (with my old school Dymo label maker) &, in the tradition of advent, are to be opened each day leading up to Christmas, from December 1st thru December 24th.

Whatcha waitin' for??
Go shopping!!

Psst! HERE'S a sneak peek!!
♥

Thursday, November 10, 2011

"Dream" Owlie Ornaments


In these colors...
•apple green
•steel grey
•cinnamon
•baby pink
•calypso sky
•bark brown

♥

Thursday, January 6, 2011

Come on in, we're OPEN!


I decided to open the shop early!
Getting a lot of handmade requests.
Which is good!
Super good!
Here's to a crafty 2011!
And look what's in the shop again: Vintage Fork Easels!!
Get 'em while they're hot & fresh.

Saturday, October 2, 2010

Happy Packaging

So, SO excited about the new packaging for sale in the shop.
I send small orders out in envelopes very similar to these & my customers LOVE them!
I thought it would be fun to make them available to you!
Check 'em out HERE.

Thursday, December 17, 2009

In LOVE with "UP".


A lovely customer sent this photo to me after ordering 2 of my Vintage Grape Soda Bottle Cap Badges this summer & using them in her wedding. It is perfect & sweet in every way!

(Get your own Vintage Grape Bottle Cap Badges at WhiMSy love NOW!)
*Photo credit: Ken Graham


Sunday, October 26, 2008

Leaf Rubbings Tutorial

I thought I’d do something with Autumn leaves, before they all fall to the ground with their crunchy brown selves. I admit that this craft started in a different way. I had read about how to pound leaves onto paper--just like flowers I’ve done in the past on fabric--but it didn’t go at all like the book said it would. So, I improvised & came up with this idea instead: leaf rubbings. (I love when stuff like that happens!)


After another delightful walk in the neighborhood, my 6-yr old & I collected some leafy specimens. We came home & laid out all our supplies. (My daughter, whining in the background: “Mom. WHY do you have to take PICTURES?!?!”…..She really should know me better than that.)
Here are your supplies: paper or notecards, wax paper, a smooth rock, & leaves.


A flat surface works best. We started “pounding” the leaves inside on the kitchen table. After we realized it wasn’t really working--& that our adjoining neighbors might not like the beat, beat, beat of the rocks, we went outside on the flat concrete & discovered that the "rubbing" process would work best.

You might want to practice on a piece of plain paper first, to get the feel of the pressure you should use & to see which leaves work best. I found the more vein-y, fresher leaves worked very well. And some of the leaves did better than others. Just experiment first.

So, first lay out your paper. We made cards. Place your leaf, or leaves, on top of the paper.

Put some wax paper on top of the leaf. You’ll want to hold the wax paper taut so the leaf underneath doesn’t move around much. It might move around a little--but that’s no biggie.

Take a smooth rock & start rubbing the leaf. You’ll find that in some spots--like on the edges of the leaf--going in one direction works best. You can take a peek during your work, by slightly lifting the edge of your leaf up & seeing if the color is bleeding onto the paper. By the way, that’s what you want: as much color as possible.

Don’t rub so hard that you start to tear the wax paper or smoosh the leaf guts onto your paper.


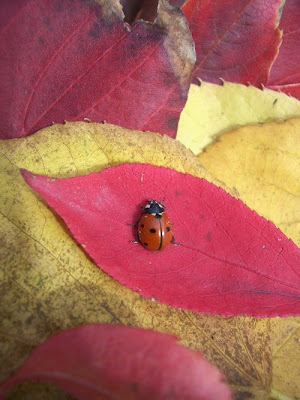
We had to pause during our craftin' to say hello to a ladybug that came to visit...

That's it! Now from here, you can embellish them, spiff 'em up a bit, whatever you want.
I left some cards blank.


On this one I rubbed several different leaves for a collage effect & then traced the outlines & veins with a glue pen & added glitter.
On this card I simply made a border with a brown pen.

This card was created using a rubbing of a single leaf.

After writing words or phrases that remind me of "Fall" all around the leaf, I splattered black ink with a toothbrush all over the front of the card.

Black paint will work too. Just add a couple drops onto the toothbrush.

Wear gloves & flick away!
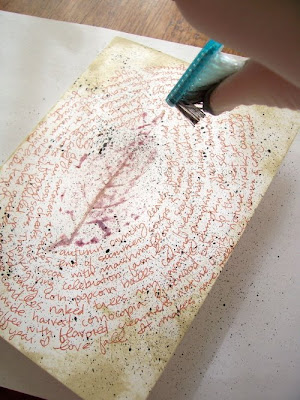
I distressed the corners & edges with some "Distress Ink" to give it an aged or worn appearance, & then added 4 triangle pieces to the corners with scrapbook paper.

Have fun making cards or decorations with your leaf rubbings. They'll be great for the upcoming Thanksgiving holiday!

Saturday, October 18, 2008

SATURDAY NIGHT SPECIAL!!


Get yer holiday 'shop-on' early!!!
Tonight's special is BUY ONE GET ONE HALF OFF--EVERYTHING at WhiMSy love!
(lower priced item receives discount).
Sale ends midnight PST.

HAPPY SHOPPING!


Sunday, March 30, 2008

And The Fork Easel Goes To...


I almost forgot about the drawing!! HAHA!
I'm proud to announce the winner.....
Congrats to Kerry!!!! YAY! Woohoo! Thanks everyone for entering the drawing!


So, today marks the day--a year ago--when I officially opened WhiMSy love & filled the shop with goodies. It is so fun to look back on my last year & think that I actually got to make stuff & other people bought it. 184 items sold. That is so cool. I look forward to an even more successful year! Thanks to all my customers--you rock!


Tomorrow I'll be making cupcakes to complete my goal for March: make cupcakes from scratch. I've got the supplies & ingredients purchased & can't wait to get my cupcake groove on!!
I'm off to finish working on a "Happy Birthday" mini tag banner for the shop. All the crafty supplies are spread out. I'm sipping on some tea. I'm munching on some Girl Scout cookies (thin mints & peanut butter cookies if you really wanna know). My girls are quietly playing in the background. Ah, that's a lovely Sunday afternoon to me.

Thursday, March 27, 2008

VINTAGE BUTTON RING SALE!!


To celebrate my one-year Etsy Anniversary, all Vintage Button Rings at 'WhiMSy love' are BUY ONE GET ONE HALF OFF through March 30th!!!! That's basically like saying "Buy Two Rings for 15 Bucks? SCORE!!" Click HERE to be taken to the Funk-O-licious Jewelry section of the shop.
***Don't forget to enter the drawing to win a fork easel! I'll pick the winner on March 30th!!

Saturday, March 15, 2008

SATURDAY NIGHT SPECIALS!


HAPPY SATURDAY!
Come take a peek in the shop tonight! All fork easels are BUY ONE GET ONE HALF OFF!

And, as an introductory celebration of the Silly Cupcake Art---all prints are 15% off!

The girls & I are having a mini-spa night! Gotta go! Wee fingers await wee manicures...