 I taught my MOPS group how to make these a couple years ago & thought I'd give a tutorial. I learned how to make them from Paper Source. The first one I made kept things inside like receipts, to-do lists/grocery lists, coupons, & stamps. I made this red & brown one as a portable shipping book--to keep my packaging goodies handy when orders go out: stamps, labels, biz cards, stickers & notes.
Here are the supplies you'll need...

-envelopes (you can make your book however big or small you want. The one I'll be showing today uses 5 envelopes.)
-scissors
-glue stick
-razor
-ribbon
-scrap papers
-pencil


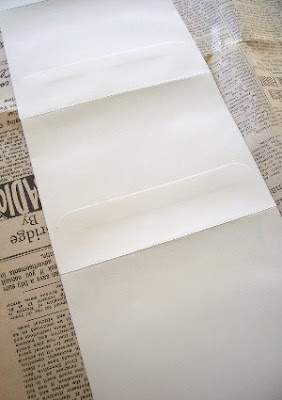
 After they're all glued you'll fold them, accordion style, back-n-forth to form a book.
 ...& cut it out.
 Use some decorative scissors to cut the straight edge & make it a bit more interesting.
 Open your book all the way & measure the very last envelope to find the center point on both sides.
 Cut a small slice through the envelope, on each side, just large enough for your ribbon to slide through.
 You'll have to reach inside your envelope to slice the side where the bottom of the last envelope lays. It's easier this way.
 Now slide your ribbon through both slots. When your book is closed, your ribbon will tie everything closed nicely.
Here's a close-up view of each envelope in this book:
This one uses large 5 1/2" x 8 1/2" envelopes & it was made with only 3 envelopes. It's a kit to help you stay organized for a party. The first envelope holds the invitations/thank you notes, the second envelope holds address labels, & the 3rd holds pre-printed templates to keep track of RSVP's & your "Party To-Do Lists".
You can use whatever size or color of envelopes you want. This one was made using small 3 1/2" x 4 1/2" envelopes. It was created to keep track of memories. (Stay tuned on October 1st for Kara's Virtual Baby Shower & I'll show you what's inside!)
These are super quick & easy to make & you can accommodate them to fit any theme you'd like! They make fun little gifts!


adorable! you are the tutorial QUEEN!!!
ReplyDeleteYou win. I vote you the craftiest chica on my blogroll.
ReplyDeleteI CAN'T wait to make this!
truly,
Sylvia C.
Oh! This is so sweet! I would love to make one to hold special notes, maybe an envelope for each month in a year. I'll be linking to this!
ReplyDeleteHey lady, I've given you an award. ;-) You can pop by my blog to pick it up.
ReplyDeleteAWESOME. I have been looking for something to hold grocery/gift receipts. I made one this morning..quick, easy, and cute! Thanks for the tutorial!
ReplyDeleteLooking forward to Thursday!!!
Kara
Your tutorials rock!
ReplyDeleteWhat a fabulous idea! I must do one of these. They would make great gifts too. Thanks so much for taking the time to make a great tutorial on this.
ReplyDeletebest wishes,
Jaime
I am the new Creative Activities person for our MOPS group, and love this new idea. I may be using it in our group if you don't mind???
ReplyDeleteThese are so cute! I'm the creative activities person for our MOPS, and I'm thinking I'd like to do these. Is this the standard size envelope? I'd like to use one a bit bigger, but I don't know where to find them... Can you help?
ReplyDeleteBTW, I love your blog! Visit every day.
Kimberly
The size used in the Paper Source website is the "A2" sized envelopes--which measure 5 3/4" x 4 3/8". I think they might also be referre to as "invitation" envelopes. You can use any size though. I got some at Walmart--in the office supply section. And, believe it or not, I got a lot of my envelopes at a thrift store. There were bags & bags of just random envelopes bundled together for sale. SCORE!
ReplyDelete(P.S. I'd love to send you the peach cobbler recipe Kimberly--but you were signed in as "anonymous" & I don't have a way to contact you. My email addy is on the right sidebar.)
coolness
ReplyDeleteThanks! I'll email you!
ReplyDeleteKimberly
Fresh and fun idea! Thank Anna-Marie for the link here. I'll have to try this. I can tell it could get addictive to make them for many wonderful purposes! Yours are so cute!
ReplyDeletelove this! just found you through a friend's blog and this is too cute! so many possibilities here :)
ReplyDeleteit was super adorable and smart too. i'm making this for my yearly lesson plans (it consist lots of papers in many category)
ReplyDelete