
 I thought I’d do something with Autumn leaves, before they all fall to the ground with their crunchy brown selves. I admit that this craft started in a different way. I had read about how to pound leaves onto paper--just like flowers I’ve done in the past on fabric--but it didn’t go at all like the book said it would. So, I improvised & came up with this idea instead: leaf rubbings. (I love when stuff like that happens!)
After another delightful walk in the neighborhood, my 6-yr old & I collected some leafy specimens. We came home & laid out all our supplies. (My daughter, whining in the background: “Mom. WHY do you have to take PICTURES?!?!”…..She really should know me better than that.)

Here are your supplies: paper or notecards, wax paper, a smooth rock, & leaves.

A flat surface works best. We started “pounding” the leaves inside on the kitchen table. After we realized it wasn’t really working--& that our adjoining neighbors might not like the beat, beat, beat of the rocks, we went outside on the flat concrete & discovered that the "rubbing" process would work best.
You might want to practice on a piece of plain paper first, to get the feel of the pressure you should use & to see which leaves work best. I found the more vein-y, fresher leaves worked very well. And some of the leaves did better than others. Just experiment first.
So, first lay out your paper. We made cards. Place your leaf, or leaves, on top of the paper.

Put some wax paper on top of the leaf. You’ll want to hold the wax paper taut so the leaf underneath doesn’t move around much. It might move around a little--but that’s no biggie.


Take a smooth rock & start rubbing the leaf. You’ll find that in some spots--like on the edges of the leaf--going in one direction works best. You can take a peek during your work, by slightly lifting the edge of your leaf up & seeing if the color is bleeding onto the paper. By the way, that’s what you want: as much color as possible.
Don’t rub so hard that you start to tear the wax paper or smoosh the leaf guts onto your paper.


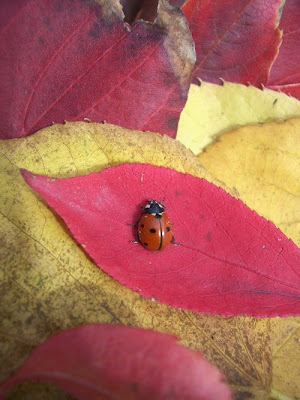
We had to pause during our craftin' to say hello to a ladybug that came to visit...

That's it! Now from here, you can embellish them, spiff 'em up a bit, whatever you want.
I left some cards blank.
I left some cards blank.

On this one I rubbed several different leaves for a collage effect & then traced the outlines & veins with a glue pen & added glitter.

On this card I simply made a border with a brown pen.

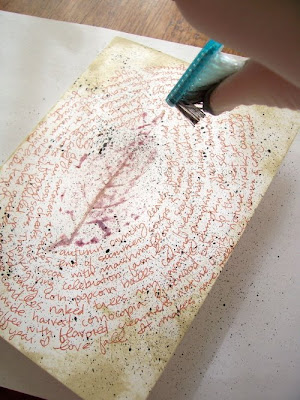
This card was created using a rubbing of a single leaf.

After writing words or phrases that remind me of "Fall" all around the leaf, I splattered black ink with a toothbrush all over the front of the card.

Black paint will work too. Just add a couple drops onto the toothbrush.

Black paint will work too. Just add a couple drops onto the toothbrush.
Wear gloves & flick away!


These are really beautiful! I love collecting Fall leaves...I'll be linking to this.
ReplyDeletei really like this idea, so simple and made with stuff we all have at home. thanks :D
ReplyDeleteanother great tute nik!
ReplyDeleteOooh!! I really like the way your card came out. Very cool and what fun. I so need to get outdoors more with the kiddos.
ReplyDeleteThat makes me want to round up my teenage children and get crafty with them. Actually, they would probably die of shock so I had better do leaf printing by myself. Thanks for the ideas.
ReplyDeleteWandered over here from One Pretty Thing. Great idea! and your blog has a great feel (with fantastic music!). Keep it up!!
ReplyDelete