Showing posts with label autumn. Show all posts

Sunday, October 26, 2008

Leaf Rubbings Tutorial

I thought I’d do something with Autumn leaves, before they all fall to the ground with their crunchy brown selves. I admit that this craft started in a different way. I had read about how to pound leaves onto paper--just like flowers I’ve done in the past on fabric--but it didn’t go at all like the book said it would. So, I improvised & came up with this idea instead: leaf rubbings. (I love when stuff like that happens!)


After another delightful walk in the neighborhood, my 6-yr old & I collected some leafy specimens. We came home & laid out all our supplies. (My daughter, whining in the background: “Mom. WHY do you have to take PICTURES?!?!”…..She really should know me better than that.)
Here are your supplies: paper or notecards, wax paper, a smooth rock, & leaves.


A flat surface works best. We started “pounding” the leaves inside on the kitchen table. After we realized it wasn’t really working--& that our adjoining neighbors might not like the beat, beat, beat of the rocks, we went outside on the flat concrete & discovered that the "rubbing" process would work best.

You might want to practice on a piece of plain paper first, to get the feel of the pressure you should use & to see which leaves work best. I found the more vein-y, fresher leaves worked very well. And some of the leaves did better than others. Just experiment first.

So, first lay out your paper. We made cards. Place your leaf, or leaves, on top of the paper.

Put some wax paper on top of the leaf. You’ll want to hold the wax paper taut so the leaf underneath doesn’t move around much. It might move around a little--but that’s no biggie.

Take a smooth rock & start rubbing the leaf. You’ll find that in some spots--like on the edges of the leaf--going in one direction works best. You can take a peek during your work, by slightly lifting the edge of your leaf up & seeing if the color is bleeding onto the paper. By the way, that’s what you want: as much color as possible.

Don’t rub so hard that you start to tear the wax paper or smoosh the leaf guts onto your paper.


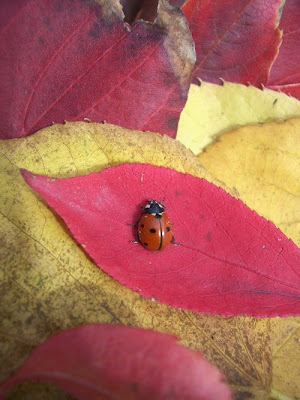
We had to pause during our craftin' to say hello to a ladybug that came to visit...
That's it! Now from here, you can embellish them, spiff 'em up a bit, whatever you want.
I left some cards blank.


On this one I rubbed several different leaves for a collage effect & then traced the outlines & veins with a glue pen & added glitter.
On this card I simply made a border with a brown pen.

This card was created using a rubbing of a single leaf.

After writing words or phrases that remind me of "Fall" all around the leaf, I splattered black ink with a toothbrush all over the front of the card.

Black paint will work too. Just add a couple drops onto the toothbrush.

Wear gloves & flick away!
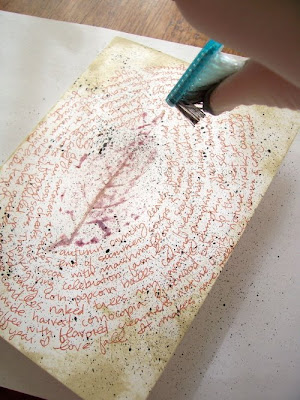
I distressed the corners & edges with some "Distress Ink" to give it an aged or worn appearance, & then added 4 triangle pieces to the corners with scrapbook paper.

Have fun making cards or decorations with your leaf rubbings. They'll be great for the upcoming Thanksgiving holiday!

Tuesday, October 21, 2008

Finally.....a Fall Walk!

Last year I took the girls on a Fall Walk to celebrate the first day of Fall. Well, when Fall came around this year, the view outside wasn't the picturesque "crunchy leaf" scene I had in my head. Now it is! Before out walk, my 4-year old performed a very scientific & intricate test outside to see if it was "jacket weather".


I just HAD to show this picture. My wee one has a runny nose, so I asked her to please put some tissues in her pocket for our walk. She came out of the bathroom, her pockets bulging with giant wads of tissues. HAHA! What a nerd.
We actually took a "Walk-n-Roll", because my 6-year old just HAD to bring along the miniature grocery shopping cart. The little one holds a bag---ready for treasures!


One of our goals on the walk was to stop by a neighboring house to see these beautiful red bushes! The girls wanted to touch them so badly.


Isn't this rock crazy? My littlest one found it. It looks exactly like a nose--with holes for the nostrils & everything!!


We also found the cutest tiny leaves. My girls described them as "dollhouse leaves".


Thanks for coming along on our walk. This breezy Fall day makes me want to fly a kite! Hey, that's not a bad idea....

Oh, & this is totally random & off the subject, but I've been thinking of listing all the tutorials I do (& have done) on the sidebar in a handy little tute section. What do you think?

P.S. I'm getting my hair cut today!!

Tuesday, October 7, 2008

Super Easy Fabric Pumpkin (no sew!) Tutorial

This might just be the most easy & quick tutorial I've ever done. I got the idea from a fellow MOPS mom (Mothers of PreSchoolers) at the MOPS convention I recently returned from in Dallas. Thanks Kaci!


I gathered an assortment of appropriate autumn-colored vintage fabrics from some of my favorite vintage shopping spots. (No, this is not my fabric collection. But I'm well on my way.)


I came up with these beauties.


You'll also need to gather some thick twigs or small chubby sticks...


...& cut some leaves. These are from the grapevines we have growing out back. You could also use artificial leaves.


Here are ALL the supplies you'll need: fabric, toilet paper roll, grocery shopping or garbage bags, leaves, sticks, & scissors. (If you don't have shopping bags, you can use towels, rags, or those random missing socks from the laundry!)

The first thing you'll need to do is cut your fabric. I cut this orange fabric to 27" x 27". It is quite thick fabric, so I recommend using lightweight stuff. For the samll multi-colored pumpkin (you'll see later on in the post) I only had fabric that measured 20" x 20". It was a tight squeeze, but it worked.


Lay your fabric out on a flat surface & plunk your t.p. roll right in the center. (I use the cheapo stuff.)


Place bags all around your toilet paper roll. The more you stuff, the bigger & puffier your pumpkin will be. Who doesn't want a puffy pumpkin?


Now, grab a corner of fabric & stuff it right into the center of the toilet paper tube.


You'll gather small bits of fabric & continue to stuff them into the tube...


...until it looks like this. Now, shove the stick & leaf into the tube. This will help keep everything together. You're done!


Make a bunch of these up in coordinating colors & decorate for Fall!


I don't recommend keeping them outdoors though. This photo was just for fun!

I have been so giddy to have many, many more blog views lately. Some of my latest tutorials have been featured on Rachel's blog, One Pretty Thing. She has the coolest site. She gathers loads of tutorials from all over the www & shares them on her blog. You click & craft, it's that simple! Visit often because she posts, like, every day. So thanks, Rachel, for noticing my DIY crafty goodies!

I also found out yesterday that my Paint Chip Notebook Tutorial has been featured on CRAFT magazines craft blog! I love that place! And again, I'm giddy!

Won't you all squeal with me? Wheeeeeeeee!!!

BLOG SPECIAL! Mention this post for a $5. special on the 'WhiMSy love' Fun-For-Fall 1" Pinback Button Set!! Original price $6.25. Good through October! YAY! Cool stuff for cheap!

Monday, September 22, 2008

H.F.D.O.F.!!!


Happy First Day Of Fall! Yay! Fall is finally here! For those of you that know me, or at least virtually know me, you might remember that Fall is my most favorite season of all! And I created this little owl graphic as a Fall present to you. Feel free to copy & paste it to your autumnal heart's delight! (**Please only use it for personal use.**)

If you're passing through for a leisurely autumn stroll by way of the virtual party at Lisa's blog, a great big HAPPY FALL hello to you!!! (***pauses to throw leaves in the air, simulating confetti**)

Actually there are no leaves to throw around here. Though the crispness in the air is just beginning, the leaves refuse to come down--or change color for that matter. To simulate the Fall atmosphere, I may just have to climb right up there & yank some off.

I think my picture of Fall might be the same as others, but I'll share anyway....Crisp. Leaves. Warm baked goods. S'mores. Campfires. Sweatshirts. Cozy sweaters. Snuggling. Blankets. Hot cocoa. Apple cider. Pumpkin Patch. Hay rides. Orange. Red. Mustard. Golden. Plum. Hazelnut latte. Sleeping with socks on. Winter's coming...


This morning I baked some yummy pumpkin treats--as has become my tradition on the first day of Fall. You can find the recipe for these Pumpkin Cream Cheese Muffins HERE.


Later today the girls & I have planned a nice walk by the river. We're bringing a cozy blanket & will be sipping on cider & hot cocoa. And while the playground, no doubt, will call their name, I--in hooded sweatshirt--will be enjoying my date with Mr. Autumn.

Well, the wee one & I are off to deliver some goodies to friends & family! Happy Fall everyone!