Showing posts with label gardening. Show all posts

Monday, May 9, 2011

If I had a green thumb...

Mother's Day had me busy. One job in particular led to the whole cleaning of the garage. I blame this baker's rack. It's actually been down in our storage room in the basement for several months. It was used in the kitchen of a house we used to live in back in Washington that was teeny tiny without much cupboard space.
Occasionally I get in a repurposing kind of mood. I hate junk. And I hate good stuff that sits around & pretends to be junk. So, I had Mr. WhiMSy love bring it up to the garage & made it into a potting bench. Funny thing is, I do not have a green thumb at all. But I still plant things & pretend that my thumb is a different color. And this new addition in the garage makes me happy.

P.S. I joined pinterest today. Wheeeee!!

Friday, March 26, 2010

Mini Cereal Box Seed Starters


I'm ready for Spring things. And this project gets me in the mood.
Start seedlings indoors with this whimsical spin on a peat pot.

Brightly colored mini cereal boxes create cozy little homes for seeds as they work their way through the soil to become big grown up flowers.
Glue the top of the box closed with a glue gun. And then take a knife & cut open, along the "dotted" lines on the front of the box. Did you know there were "dotted" lines?? When my bro & I were kids, we used to open our cereal boxes that way sometimes, slice open the bag of cereal, pour the milk right in & eat it from the box.


Fill boxes with dirt & seeds. *Dymo labels as plant markers are optional.* A Sharpie works just as swell.
I have been keeping mine on the windowsill. Make sure when you water that you have a flat dish underneath. (The water seeps out of the corners of the box.) Over time your box will warp from the waterings.
When your seedlings are big enough, transplant them to big pots! Yay for flowers! And recylcing!

Nikki

Tuesday, April 21, 2009

Cupcake Planter Tutorial

This is a project that I thought of last summer---when it was too hot & too late to grow anything lush & green in a pot. SO, I had to wait almost a whole year to put my idea into action!! It's a mild statement to say I'm SUPER DUPER EXCITED to finally do this!

Supplies: shorter stubby terracotta pots (I found some at Home Depot & some really cool short stubby ones at Fred Meyer), spray paint, acrylic paint, clear spray sealer, rocks (for drainage), potting soil, plants, drill (with 1/4" drill bit), 1/4" dowel (Hardware store or Walmart), saw blade, round wooden balls (hardware store). Also needed, but not pictured: wood glue, paint brush.

OK, the painting part: I used spray paint. I like a quick job. BUT, the terracotta pots are very porous & you're not going to get an even coat with the spray paint. I sprayed my pot 2 times & I like the uneven faded look of it. If you want a more even, solid covering of color, use at least 3 coats of acrylic paint or latex paint. (Got any extra exterior housepaint in the garage? Perfect!)

My pots will sit outside. They'll eventually show the effects of the weather & daily watering. Definitely paint the inside of the pot as well as the outside. This will help keep the moisture from damaging your artwork. If you keep your pot out of direct weather elements this will help it to keep cuter for longer too. Paint your dowels also. I painted mine with brown acrylic paint so it would remain inconspicuous in the pot-o-flowers. You'll be trimming the dowel to the correct size later. And finally, paint the round wooden balls red. I spray painted mine. AND, I sealed them with a clear spray paint sealer.
When the "cherries" are dry, drill a hole in the bottom. Or you could do the drilling BEFORE the painting. I guess I did it backwards. Mine came with a tiny hole pre-drilled in the bottom, but it wasn't nearly big enough.

Fill the hole with wood glue & insert the dowel. Poke it in the ground to dry.
Now you can work on the details of your pot, which you'll paint with brown acrylic stripes to resemble a cupcake liner. When the stripes are dry, seal the pot--inside & out--with the clear spray paint sealer. This is probably the most important step. Without a good seal, the water could cause your paint to bubble or eventually chip & flake off. Lots of coats of paint & a good sealer are the key to keeping your terracotta pots lovely for a long time! Now, take a break & munch on an ice cream sandwich. Num...

When everything is super duper dry, (OK, I'm impatient. Mine was mostly dry), you can cover the drainage hole with a few pebbles.

And then gather the curious neighborhood kids to help you with the rest. That's what I did. Well, I guess I didn't have to "gather" them. They just came over to see what I was up to. Even one skateboardin' boy said, "I want to paint some pots & fill 'em with flowers too!"

For some reason I had trouble deciding which plants to purchase for my cupcake planters. I wanted something that could be pruned to a roundish shape. I ended up finding this really thick, really lush plant called "Lobelia" Riviera Rose (at Fred Meyer). I also picked out some white Alysum for my smaller cupcake pot. I've never "pruned" them in a specific shape before, so we'll see how it goes! After you plant your flowers, take some scissors or pruning shears & clip away any stragglers. I kinda butchered mine, but hopefully they'll continue to grow nice & thick.

At this time you can measure your plant to see how tall your cherry should be.
Ta-da! That's it! The little flowers will look like sprinkles all over the cupcake.


I'll be sure & take pictures as flowers bloom & the pot fills out more.
Wasn't that fun?

Saturday, April 18, 2009

dirt & stuff.

What got into me yesterday? I turned into Super Garden Girl. I really, really, really, really love being outside with my pots & soil & mini shovel & cute garden gloves. But most of the time the stuff I attempt to grow ends up....not growing. The girls & I had so much fun making our yard all cute!


But this is my NOT favorite part. If someone ELSE could clean up the mess, that would great!

I went SO berzerko in the yard that I was ALREADY sore before I sat down to eat dinner.
I potted petunias, pansies & alysum in pots out front... I finally got a plant to put in the most awesomely bright purple planter I spray-painted a few weeks ago... I cleaned up the rest of last Fall's leaves (hee hee)... I noticed some scalloped brick border laying haphazardly in our yard, that's been there since we moved in 14 months ago. (Musta been on our landlord 'to-do' list prior to our arrival.) SO, I "installed" it in-between my neighbor & my duplex.

I paused to take photos of all the worms & other creepy crawlies that my girls & the neighbor kids were collecting. Ew.
I repotted 3 African Violets that I received as a present a few years ago from my grandmother. They were part of the flowers at my grandpa's funeral &, miraculously, I've kept them green & growing. They haven't been repotted since I got them & I'm nervous about their transplant. Hopefully they will survive. I even took a toothbrush & cleaned the dirt off all their leaves. Those little hairy leaves attract everything!
And finally, the girls & I went on a treasure hunt of sorts. Remember those sunflower seeds we planted a few weeks ago? Well, I never marked where we planted them. We were on an urgent mission to find the sprouts before daddy mowed over them on his next lawn adventure. We spotted several, but not all of them. THIS time we marked them with bright pom-poms glued on toothpicks. I'm so proud of us! The seeds are growing!!!
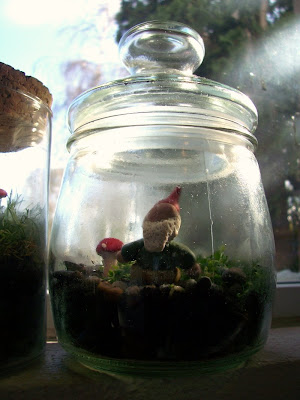
After a yummy BBQ grilled dinner I relaxed with my feet up on the couch while watching Season 3 of 'The Office' & crafting.
I'm afraid to wake up & feel the pain...
Have a happy weekend!

Tuesday, April 14, 2009

Terrific Terrariums!!

I ♥ terrariums.

Seriously.

I'm SO happy with how my miniature ecosystems turned out.

And, of course, I went picture crazy.

I'm TOTALLY excited to show this project to my MOPS group today. (Mothers Of PreSchoolers.) I was bummed to not get real moss, so I resorted to ground cover. I found a great deal at Home Depot for most of the greenery. There were about 4 or 5 varieties to choose from. I also purchased pea gravel & regular potting soil. I didn't use the activated charcoal in these little terrariums as I was trying to cut costs for our group of 30. The charcoal helps with drainage (but so do the rocks) & controls any odor that might occur.

In fact, click HERE for a really great tutorial on how to make terrariums, including tips on caring for your miniature world of green.


For containers we'll mostly be using wide-mouthed quart canning jars, but I also recycled food jars. I tried thrifting for some more unique containers but didn't have much luck. You can also see the tiny little terrariums my girls made from artichoke heart jars.

Dinner was delayed due to the mess on the dining table.

I rolled large paper bags down really short & inserted plastic shopping bags. I filled 4 bags with pea gravel & 4 bags with potting soil for each table. Each table will also be supplied with an assortment of plants & jars to choose from.
Taking notes from the previously mentioned terrarium tutorial, I printed out a "how to water & care for your terrarium" cheat sheet for each person.

The little mushrooms I've been working on will finally receive little happy homes! Each person gets to pick a favorite for their terrarium.
I was thinking how much fun kids would have making these (I know my girls did!)--& for decorations they could use a matchbox car or tiny Barbie accessories or any little toys really.
Jennifer gave me a great idea too: stamp words on little pebbles for terrarium decorations. She also reminded me of another idea in my "tutorial file": paint little rocks & add them to your terrarium. Remember my rock painting tute? Click HERE for a recap. Oh!-Tiny painted rock creatures would be an adorable addition to these adorable terrariums!
I know some of your were creeped out by the little gnome dude. But he really is my favorite part of it all!
The car is loaded with jars & gravel & plants & soil & all the necessary terrarium decor, awaiting some morning crafty fun. I'll let you know how it goes!