
This is about the cutest thing I've seen in a long time. I learned how to make them from one of my favorite crafty shows,
Creative Juice. The girls & I had a lovely time "baking" up some tiny faux treats--perfect for their Barbies!

Here are the supplies you'll need:
2 sponges in different colors: a cake color & a filling color
marker
scissors
acrylic paint in "frosting" colors
paintbrush
glue
assorted ribbons, trims, beads, sequins & jewels for decorating

The directions on the website said to use "flat" sponges. Mine were a little thick. So you can see in the picture how I sliced them right down the middle with a sharp serrated knife. (The top two on the stack were sliced.)
Trace a circle onto the sponge you'll use for the "filling". Trace two circles onto the sponge you'll use for the "cake". For the white frosted cake, I traced the bottom of a glue bottle. For the blue frosted cake, I traced the bottom of a small paint bottle.
I had some black marker still left on the sponge, so I cut those extra bits off.
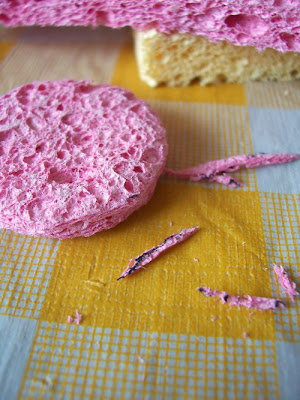
Spread glue in between each layer... 
...& softly squeeze them all together. You'll have to wait for the glue to dry--maybe a couple hours-- before you complete the next steps. 
Oh Barbie! So impatient. Although, using the hairdryer to speed things up ain't such a bad idea... 
...especially when you have these sweet crafty kidlets waiting t00! 
When your "sponge" cake is dry, you'll want to cut a small wedge out of it. If you cut out a nice enough slice, you can save it, paint it & decorate it too. My slices of cake didn't come out so pretty, so we tossed them into the crafty scrap pile.
At this point you can take your scissors & fix any edges that are bumpy or uneven.

Now choose your frosting color & paint the sides, top & bottom--but DON'T paint the inside of the wedge! While you're waiting for the paint to dry you can make the wee pies from yesterday's tutorial. (And maybe you can ask Barbie to pull out her hair dryer again.)

Use your ribbons, beads, baubles & doo-dads to decorate your cake! And that's it! I was thinking these would make perfect Christmas stocking stuffers for my girls but I was too eager & had to show them how to make 'em! The sponge cake & bottlecap pies are shown with the teeny tiny cupcakes from WhiMSy love.

Bon appetit!


 Mr. WhiMSy love brought home this All American Chocolate Cake from Costco.


 She had a cowgirl/horse party & it was one of the most fun parties I've ever planned for my girls! Being in September, I have the option of having her party outdoors. So, we invited guests to a park by the river & it was perfect! The wee western guests were greeted with their very own stick horses (the party girl got one that made horsey noises!), cowgirl hats (purchased at dollar stores & thrift stores), & bandannas (made from fabric I purchased at Walmart).


 I baked the massive cookie in my cute little oven at 375 degrees for 20 minutes. Then I watched as the dough creeped to the edge of the pan & started dripping over. Ugh.


